[en] Azure Authentication with Service Principal
[en] This article looks at how to authenticate with an Azure AD service principal as the identity of the application instance.
[en] Common Prerequisites
[en] Available account in Azure Active Directory.
[en] Available Azure MS SQL server.
[en] Azure Active Directory is set to centrally manage identity and access to Azure SQL Database.
[en] Installed MS ODBC Driver for SQL Server. The current version is 17.
[en] Azure Managed Identity created. Object (principal) ID is stored.
[en] Azure Service Principal, appId (is used as userId), and password are stored.
[en] The user that corresponds to the Service Principal is created in SQL Database and the proper role is assigned to the user.
[en] For more information, see the Create an Azure service principal with the Azure CLI article on the Microsoft documentation portal.
[en] DSN Connection
[en] You can connect with DNS using Data Connection Manager (DCM) or without it.
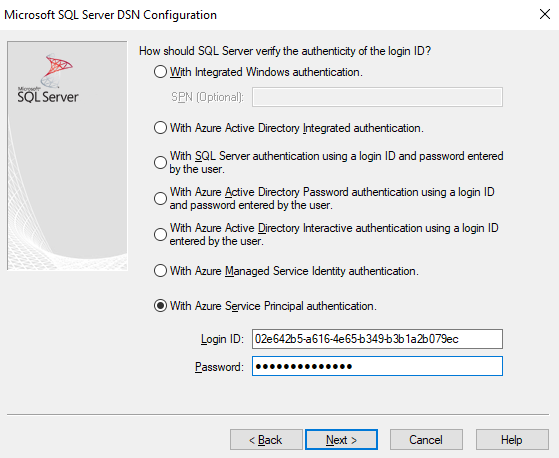
[en] Prerequisites: User or System DSN is configured in ODBC data source manager to use Azure Service Principal authentication.
[en] DSN Connection without DCM
[en] Place the Input Data tool on the Designer canvas.
[en] Select the down arrow in the Connect a File or Database field.
[en] From Data Sources, choose Microsoft Azure SQL Database - ODBC.
[en] Choose DSN created in the preconditions from the dropdown.
[en] Provide User ID and Password.

[en] Choose any table from your database in the Query Builder.
[en] Select OK.
[en] DSN Connection Using DCM
[en] Make sure that DCM is enabled.
[en] Place the Input Data tool on the Designer canvas.
[en] Below the Connect a File or Database field, select Set Up a Connection.
[en] Choose Microsoft Azure SQL Database - ODBC from Data Sources.
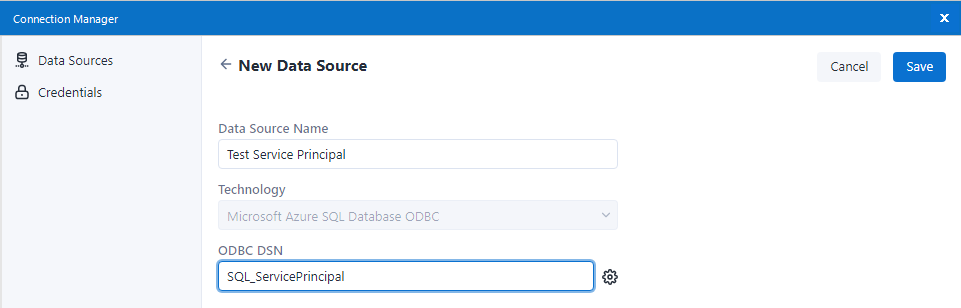
[en] Select the Add Data Source button.
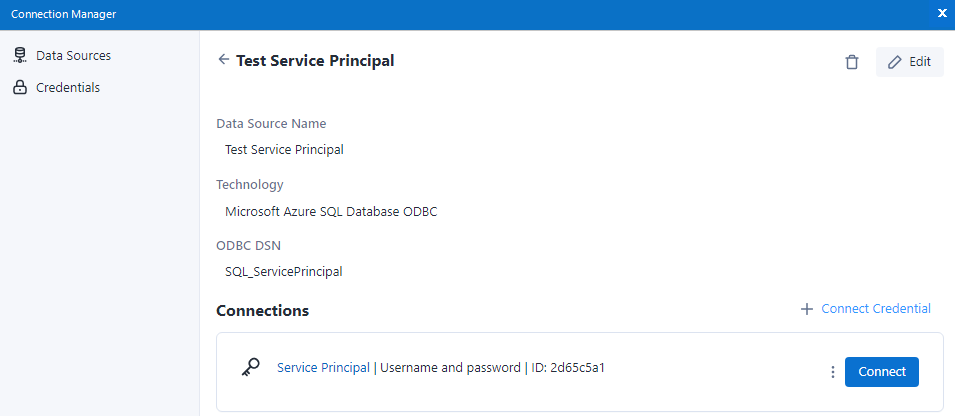
[en] Enter descriptive Data Source Name.
[en] Enter the name of DSN created in ODBC Data source manager and select Save.
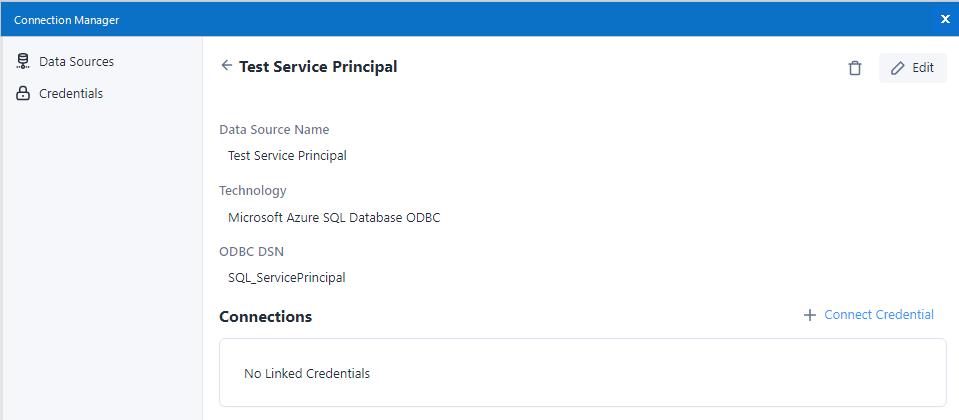
[en] Select Connect Credential.
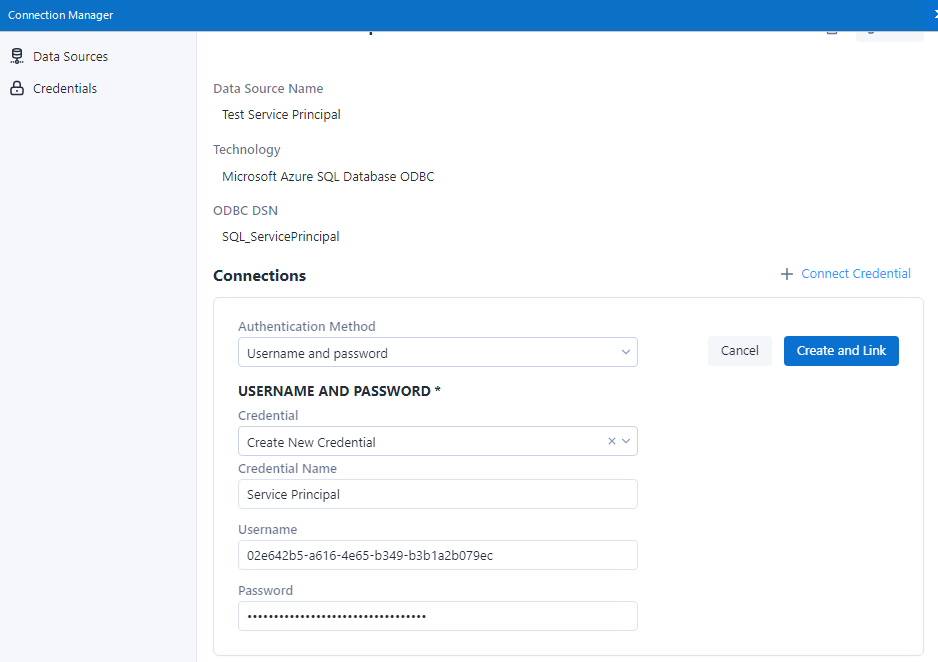
[en] For Authentication Method select Username and password.
[en] Select Create new Credential for Credential.
[en] Enter a descriptive name for Credential.
[en] Enter Username and Password.
[en] Select Create and Link.
[en] Select Connect.
[en] Choose any table from your database in the Query Builder.
[en] Select OK.
[en] DSN-less Connection
[en] You can establish a DSN-less connection using Data Connection Manager (DCM) or without it.
[en] DSN-less Connection without DCM
[en] Place Input Data tool on Designer canvas.
[en] Enter this Connection string in the Connect a File or Database field:
[en]
odbc:Driver={ODBC Driver 17 for SQL Server};Server=tcp:<_your_server_>,1433;Database=<_your_db_>;UID=<_your_user_id_>;PWD=<_your_password_>;Authentication=ActiveDirectoryServicePrincipal[en] Replace the text between the <> with actual values.
[en] Select the 3 dot icon next to the Table or Query option.
[en] Choose any table from your database in the Query Builder.
[en] Select OK.
[en] DSN-less Connection Using DCM
[en] Make sure that DCM is enabled.
[en] Place the Input Data tool on the Designer canvas.
[en] Below Connect a File or Database field select Set Up a Connection.
[en] Choose Microsoft SQL Server - Quick connect from Data Sources.
[en] Select the Add Data Source button.
[en] Provide a descriptive name for Data Source Name, actual server, and database name.
[en] Make sure the Driver is set to ODBC Driver 17 for SQL Server.
[en] Select the Save button.
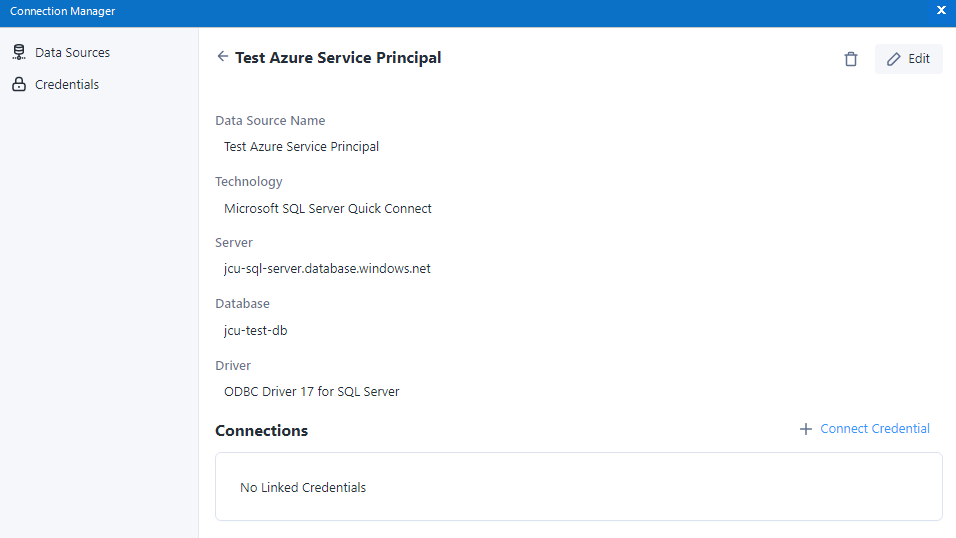
[en] Select Connect Credential.
[en] Choose or provide Azure Active Directory Service Principal for Authentication Method and select Link.
[en] Select Create New Credential.
[en] Enter a descriptive Credential Name, Client ID, and Client Secret.
[en] Select the Create and Link button.

[en] Select Connect.

[en] Choose any table from your database in the Query Builder.
[en] Select OK.