障害復旧(ディザスターリカバリー)の準備
重要
本セクションでは、以下の2つのホストで説明します。
元のホスト: Alteryx Serverを実行している現在のホストです。
ターゲットホスト: 障害復旧に使用するバックアップホストです。このホストは、バックアップホストとして使用するためのAlteryx Serverライセンスは不要です。
必要条件
現在のAlteryx Server環境とは独立して保存された、Alteryx Server永続レイヤー(MongoDBまたはSQL Server)のバックアップ。
注記
This guide does not cover creating a backup of the Persistence layer required for disaster recovery. For more information on Server backup and recovery for embedded MongoDB, see Server Backup & Restore Best Practices: Part 1 and Part 2. For user-managed MongoDB or SQL Server instances, please contact your MongoDB or SQL Server administrator.
事前に準備したRuntimeSettings.xml。RuntimeSettings.xmlの準備を参照してください。
オプション
次の項目は、復元元Serverで利用されている場合があります。元のServerでその機能が使用されているかどうかを確認します。該当する場合は、次のファイルとリソースのコピーが、現在のServer環境とは関係なく利用できることを確認します。
AlteryxServiceログオンユーザー資格情報
Run Asユーザー資格情報
SMTPサーバー資格情報
%ProgramData%\Alteryx\Toolsのコネクタツール。次のAlteryxシステムベースエイリアスおよびIn-DB接続エイリアス:
システムデータ接続:
%ProgramData%\Alteryx\Engine\SystemAlias.xmlIn-DBデータ接続:
%ProgramData%\Alteryx\Engine\SystemConnections.xml
復元元ServerのAlteryxユーザーベース接続エイリアスとIn-DB接続エイリアス。以下の項目は、各Run-Asまたはワークフロー資格情報ユーザーアカウントに関連する場合があります。
ユーザーデータ接続:
C:\Users\[username]\AppData\Roaming\Alteryx\Engine\UserConnections.xmlユーザーのIn-DBデータ接続:
C:\Users\[username]\AppData\Roaming\Alteryx\Engine\UserAlias.xml
重要
以下の表に記載されているServerのバージョンをお使いの場合、このガイドのプロセスは不要です。元のホストのRuntimeSettings.xmlとデータベースのコピーが利用可能な場合は、Serverホスト復元ガイドに従って障害復旧を行うことができます。
Serverホスト復元ガイドを使用するAlteryx Serverのバージョン |
|---|
2021.4.2.47792 (パッチ4)以前のバージョンまたはパッチ |
2022.1.1.40869 (パッチ2)以前のパッチ |
RuntimeSettings.xmlの準備
先日の暗号化方式の変更(TGAL-6764)により、ユーザーは、元のAlteryx Serverコントローラーノードが使用できなくなった場合の障害復旧シナリオに対し、事前に備える必要があります。このガイドでは、障害復旧に使用するバックアップコントローラーノード上のRuntimeSettings.xmlファイルを準備する手順について説明します。
必要条件
元のホストおよびターゲットホストへの管理者アクセス。
元のホストが動作可能で、AlteryxServiceが実行されている必要があります。
元のホスト | 対応するターゲットホスト |
|---|---|
2021.4.2.47792 (パッチ5)以降のパッチ | 2021.4.2.47884 (パッチ11)以降の2021.4バージョンのパッチ |
2022.1.1.42590 (パッチ3)以降のパッチ | 2022.1.1.42691 (パッチ9)以降の2022.1バージョンのパッチ |
2022.3.1.430 (Server GA)以降のパッチ | 2022.3.1.553 (パッチ6)以降の2022.3バージョンのパッチ |
2023.1.1.123 (Server GA)以降のパッチ | 2023.1.1.247 (パッチ2)以降の2023.1バージョンのパッチ |
Alteryx Serverのすべての最新バージョンおよび将来のバージョン | 元のホストとターゲットホストが同じバージョンとパッチであれば、GAまたはパッチリリースは問いません。 |
ステップ1: Alteryx Serverをインストールする
# | ステップ | 詳細 |
|---|---|---|
1.1 | 元のホストとターゲットホストにAlteryx Serverの最新バージョンとパッチをアップグレードまたはインストールできますか? | はい: 元のホストとターゲットホストにAlteryx Serverの最新バージョンとパッチをアップグレードまたはインストールします。元のホストを通常どおり設定します。 ステップ2.1に進みます。 注: この手順ではライセンスは必要ないため、インストール後にAlteryx Serverをターゲットホストで設定する必要はありません。 |
いいえ:ステップ1.2に進みます。 | ||
1.2 | 元のホストとターゲットホストを、そのバージョンの最新パッチにアップグレードできますか? | はい: 元のホストにメジャーバージョンの最新パッチを適用し、ターゲットホストに最新の一致するバージョンとパッチをインストールします。たとえば、2022.3パッチ3を使用している場合は、2022.3で利用可能な最新のパッチをインストールします。 ステップ2.1に進みます。 注: この手順ではライセンスは必要ないため、インストール後にAlteryx Serverを設定する必要はありません。 |
いいえ:ステップ1.3に進みます。 | ||
1.3 | 元のホストのAlteryx Serverのバージョンは、必要条件セクションの互換性のあるターゲットホストのリストに記載されていますか? | はい: ターゲットホストを、元のホストとまったく同じメジャーバージョンおよびパッチバージョンにインストールまたはアップグレードします。パッチインストールではなく、フルインストールファイルを使用してください。 必要に応じて、fulfillment@alteryx.comに連絡して、必要なインストールファイルを要求してください。 ステップ2.1に進みます。 注: この手順ではライセンスは必要ないため、インストール後にAlteryx Serverを設定する必要はありません。 |
いいえ:ステップ1.4に進みます。 | ||
1.4 | ターゲットホストにAlteryx Serverの最新のパッチバージョンをインストールします。 | ターゲットホストに、元のホストにインストールされているメジャーバージョンで利用可能な最新のパッチをインストールまたはアップグレードします(たとえば、元のホストが2022.3パッチ3を使用している場合は、ターゲットホストに2022.3の最新のパッチをインストールします)。 ステップ2.1に進みます。 注: この手順ではライセンスは必要ないため、インストール後にAlteryx Serverを設定する必要はありません。 |
ステップ2: コントローラートークンとRuntimeSettings.xmlを準備およびコピーする
# | ステップ | 詳細 |
|---|---|---|
2.1 | 元のホストのコントローラートークンの長さを確認します。 | [Alteryxシステム設定] > [Controller] (コントローラー) > [General] (一般)で、[View] (表示)を選択します。コントローラートークンの長さを記録します。 注: 一部のバージョンでは、コントローラートークンが部分的に表示されません。トークンをダブルクリックして全体を強調表示し、テキストドキュメントにコピーアンドペーストして長さを確認します。 |
2.2 | コントローラートークンの長さは40文字ありますか? | はい:[Alteryxシステム設定] > [Controller] (コントローラー) > [Genera] (一般) > [Regenerate] (再生成)を選択します。 |
いいえ:ステップ2.5に進みます。 | ||
2.3 | AlteryxServiceを再起動します。 | [Alteryxシステム設定]の残りの設定を確認して、[Finish] (完了)を選択します。これによりAlteryxServiceが再起動します。 |
2.4 | 追加のノードを再接続します(該当する場合)。 | マルチノードセットアップの場合は、新しく再生成したコントローラートークンを使用して、すべてのノードをコントローラーノードに再接続します。 |
2.5 | 元のホストから[コントローラートークン]を保存してコピーします。 | コントローラートークンは、[Alteryxシステム設定] > [Controller] (コントローラー) > [General] (一般) > [Token] (トークン) > [View] (表示)に移動します。 コントローラートークンをコピーしてテキストドキュメントに保存します。次に、テキストドキュメントをターゲットホスト上の任意の場所にコピーします。 注: 一部のバージョンでは、コントローラートークンが部分的に表示されません。トークンをダブルクリックして全体を強調表示し、テキストドキュメントにコピーアンドペーストします。 |
2.6 | 元のホストからRuntimeSettings.xmlをコピーします。 | RuntimeSettings.xmlファイルを元のホストの%ProgramData%\Alteryxからターゲットホストの任意の場所にコピーします。 重要: ファイルをターゲットホストの |
ステップ3: RuntimeSettings.xmlを復元する
# | ステップ | 詳細 |
|---|---|---|
3.1 | ターゲットホスト上のbinフォルダーでコマンドプロンプトを開きます。 | 管理者としてコマンドプロンプトを開き、Alteryx\binインストールフォルダーに移動します。このセクションのコマンドはすべて、このフォルダーから実行する必要があります。 注: このフォルダーの場所がわからない場合は、「Alteryxシステム設定」ショートカットのプロパティを確認することで、このショートカットで指されるファイルが目的のフォルダーにあることを確認できます。既定の場所は |
3.2 | AlteryxServiceを停止します。 | 次のコマンドを入力します。
AlteryxServiceが実行されていた場合、成功すると「The AlteryxService service was stopped successfully.」と表示されます。 AlteryxServiceが停止していた場合は、「The AlteryxService service is not started.」と表示されます。 このウィンドウは開いたままにしておきます。 |
3.3 | ターゲットホスト上の既存のRuntimeSettings.xmlをバックアップします。 | バックアップとして、ターゲットホストの%ProgramData%\Alteryx\RuntimeSettings.xmlの名前をRuntimeSettings_BACKUP.xmlに変更します。 RuntimeSettings.xmlが存在しない場合は、ステップ3.4に進みます。 |
3.4 | RuntimeSettings.xmlを復元します。 | ステップ2.6で元のホストからコピーしたRuntimeSettings.xmlファイルを、ターゲットホストの%ProgramData%\Alteryxにコピー/ペーストします。 注: 必ずファイルをコピーしてください。このガイドでは、元の状態のファイルが必要になるため、ファイルの移動およびカットはしないでください。 |
3.5 | コントローラートークンをクリアします。 | ターゲットホストで%ProgramData%\Alteryx\RuntimeSettings.xmlを編集します。 <ServerSecretEncrypted>タグ間をすべて削除し、以下ようにタグだけを残します。  |
3.6 | RuntimeSettings.xmlを保存します。 | ターゲットホストでRuntimeSettings.xmlを保存します。 |
3.7 | コントローラートークンを復元します。 | ステップ3.1で開いたコマンドプロンプトに戻り、ステップ2.5で収集した元のホストのコントローラートークンを使用して次のコマンドを入力します。
トラブルシューティング: バージョン2021.3+では、このステップで次のエラーが発生する場合があります: 「サーバーシークレットの設定に失敗しました: CryptImportKey(3)のエラー: 不良なデータ。(-2146893819)」。これを修正するには、ステップ3.5-3.6を参照して、タグ間から値が削除されていることを確認してください。 |
3.8 | ストレージキーをクリアします。 | ターゲットホストにある%ProgramData%\Alteryx\RuntimeSettings.xmlを再度編集します。 <StorageKeysEncrypted>のタグ間をすべて削除して、以下のようにタグだけを残します。 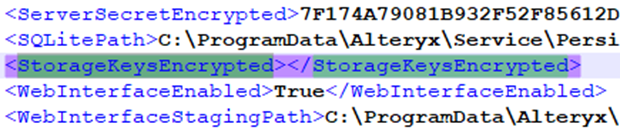 |
3.9 | ストレージキーを復元します。 | ステップ2.6のRuntimeSettings.xmlから<StorageKeysEncrypted>をコピーして、ターゲットホストにあるRuntimeSettings.xmlの<StorageKeysEncrypted>タグの間にペーストします。この値の長さはバージョンによって異なります。以下の例を参照してください。 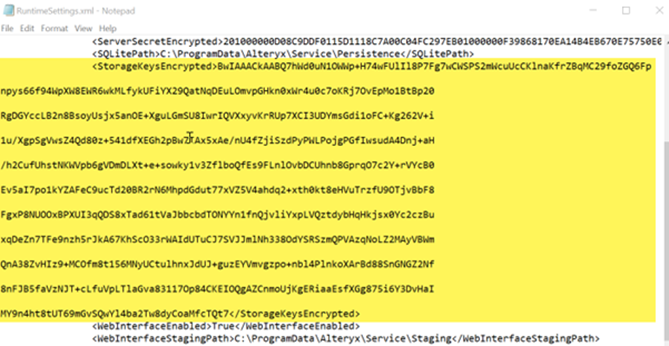 |
3.10 | RuntimeSettings.xmlを保存します。 | ターゲットホストでRuntimeSettings.xmlを保存します。 |
3.11 | Run Asユーザーを復元します。 | 元のServerにRun Asユーザーが存在する場合は、次のコマンドを入力します。存在しない場合は、この手順をスキップします。
|
3.12 | SMTPパスワードを復元します。 | [Alteryxシステム設定] > [Server UI] > [SMTP ] > [Password] (パスワード)に入力した場合(SMTPチェックボックスがオフになっていても)、次のコマンドを入力します。入力しなかった場合は、この手順をスキップします。
|
3.13 | 暗号化キーを復元します。 | 重要: 従来のServerのコントローラーノードでAlteryxServiceが実行されており、新しいServerからネットワーク経由でアクセスできる必要があります。 暗号化キーの転送プロセスのステップを使用すると、元のホストからターゲットホストに暗号化キーを転送できます。暗号化キーの転送プロセスの最後のステップでは、Serviceを再起動する必要があります。このステップは、ターゲットホストにライセンスがない場合実行できない場合があり、スキップすることができます。 |
完了です! これで、元のホストが使用できなくなった場合の障害復旧シナリオで、ターゲットホスト上のRuntimeSettings.xmlファイルが使用できるようになりました。ステップ3で準備したRuntimeSettings.xmlは、元のホストで使用していたMongoDBまたはSQL DBを使用しているターゲットホストでのみ動作することに注意してください。
その後の使用について
元のホストは新しいバージョンのServerにアップグレードされているので、このプロセスの後、ターゲットホストも同じバージョンにアップグレードしてパッチを適用することで、障害復旧シナリオで最良の結果を得ることができます。
元のホストでコントローラートークンを変更した場合は、ステップ2以降を再度実行して、ターゲットホストと元のホストのコントローラートークンを一致させてください。